Posts

Review for my 1 year of being a sewing DIY Youtuber/Bloger

Image
I am looking back for my 1 year of sewing DIY youtube and blogging. This is not a statement, it's just my diary, and floating thoughts at the moment I am writing. Making time on evey weekend, Making time by having days off from work, For sewing, For videoing sewing procedures, For editing videos, For uploading videos on Youtube, For blogging, For uploading pictures on instagram. For A year. Good things I think. Firstly , my sewing skill improved. Secondly , the uploaded youtube videos and blogs are usful for me. For example, I made a summer simple dress, and I like wearing it, so I wanted to make a few more for me and my friend. Before I make dresses I read my blog and watched my Youtube video again, which helped me making easily without spending too much time to think of procedure. Thirdly , I am happy with accumulated records of my sewings. I believe there must be more good things, but that's all I can think of at the moment. Not good things I think. Money! I used to work 5 ...

Sewing DIY Cat's Black Harness Jacket and Pattern

Image
  My cat's 2nd harness. The first one and used to be only one for my cat got a bit dirty since he plays a lot in garden. So I wash and reuse it, and I think it woud be good with a few more of them. This time I used hook and loop tapes for neck strap unlikly last one which slide plastic buckle. The black harness also looks good on him. Tidy look on front. There's ------ on my pattern, and fold it up on ----- and cut fabrics and batting. I thought if two straps cover my cat's neck  it would be too thick and uncomfortable to move forward. In the way, only one strap to cover cat's front neck and less thicker.  After sewing all around except opening gap,  and before turn right side out, make sure to cut batting closer to stitchings. A bit rough part of the hook and loop tape to be attached on short strap of right shoulder.  A bit soft part of the hook and loop tape to be attached on long strap of left shoulder. and which way rough part won't scratch cat's neck. ...

Sewing DIY Easy Cushion covers from Shirts

Image
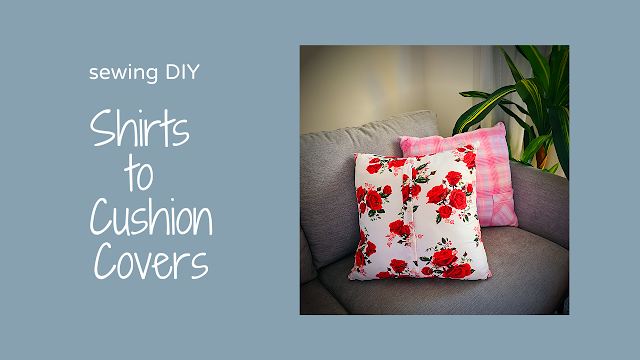
I tried making cushion covers from shirts. I was so surprised at how easy to make them!!  the cushion covers looked good! Perfect and easy way of upcycling your shirts,  and  you can give new life to old cushions at home. The cushion cover made of red roses printed shirts might be good use on couch in hot summer! 18.25" x 18.25" (46.5cm x 46.5cm) seam allowance included. Before cutting & sewing, I recommend shirts buttoned. After sewing all edges, unbutton and turn inside out.  and then finsh with cushion insert. and then Buttons up please~ For how to make, tutorial, please click the Video below, hope you enjoy. If the Video was helpful, please thumbs up  and subscribe my Youtube channel:  Mikinoos DIY Thank you. Winter pajama shirt used for making cushion cover.

Sewing DIY Hot Water Bottle Cover using old fleece pajama (Patterns)

Image
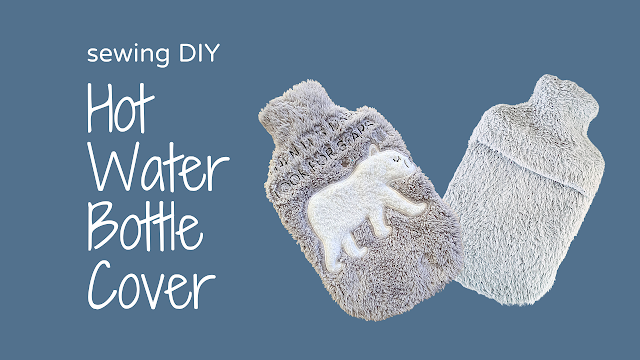
In WINTER, I fill 2 hot water bottles with hot water, and put under doona for bed time. Then I hope in the bed about 10 minutes after I put the how water bottles, and no more chil air! One I put around my upper body, and the other I put around my feet, I can sleep all night in warm till morning. I think that using hot water bottles is amajing way to sleep in warm because it's cheaper than letting hitter or electronic blankit on all night, and even good for environmental reason. Although hot water bottle is rubber, I use hot water bottle a few years. I made hot water bottle cover using my old pajama top. I am very satisfied with the hot water botter I made with fleece PJ top because it is so nice and soft feel to my skin. Seam allowance inclusive. FRONT: I added 1inch to top where bottle lid is, added 0.5inches elswhere. BACK: copied Front pattern, and added 1.5 overlap for opening. If you have the same hot water bottle as the picture above, For anyone who needs the hot water bottle...

DIY Winter Jumper for Cat and Pattern

Image
WINTER, Cold weather for every one, and my cat. My cat sleeps inside of doona next to me and keeping me warm at night. I made a winter jumper for keeping my cat warm when we go out to garden. I like putting clothes or harness on my cat because clothes or harness prevent for my cat from jumping too high over the fence go to next door. I made my cat's jumper using my old fleece PJ's top fabric. The bear on my PJ is too long and big to be on my cat's jumper, and I decorated below white cat face on jumper. Isn't it cute? At first I designed below. but ended up doing a bit different ears and eyes on jumper :) Hoping I will try below next time some time.   Put pattern like below and cut.  Sleeve's pattern put on end of Pj top which hemming already done, and later on I don't need to do sleeves hemming, otherwise I recommend to cut longer than the sleeve's pattern and you can do sleeves hemming. The pattern is good for cat with about 4.5kg and 35cm vest,  or please ...

Sewing DIY Shirts Yarn Floor Mat

Image
About 3 months ago, I made yarns from Shirts/Tshirts. Because I cut cut cut with scissors, the scissors must had been rubbing my finger skin too much continuously and I had some blisters on my fingers. And I put the shirts yarns away for a while. Finally I made a foot mat. I cut shirts yarns with 4-5cm width. I thought I would cut a bit too wide at the time.  But the yarn rolled up by itself, which did not look like 4-5cm width.  38cm x 65cm foot mat. 65cm consist of plaited 55cm from knot to knot, and 10cm fringes (5cm each side).  In the instance I cut the yarn about 2 times longer than the length (about 120cm - 130cm), and then stood up and plaited yarns to avoid yarns tangled together. and I tried not to plait them too tight. At first, I tried sewing machine with zigzag stitches to connect each plaited ones, which do the job but it wasn't looking good for me as all stitches shown. So I cut them off, and did all hand stitching (blind stitches) one by one.   For ho...

Sewing DIY Headbands with measurement details

Image
One of my friend always wears hairbands on her work day. Last time I made hairband with a twist in the middle of, but she told me it's a bit outstanding for wearing at work because of twisted part. So this time I made some flat ones for her, and finally she loves to wear them when she goes to work. Measurements: a fabric of 15.5 x 4" (40 x 10cm) a fabric of 15.5 x 3" (40 x 7.5cm) a elastic of 7.5" (19cm) For how to make, tutorial, please click the Video below, hope you enjoy. If the Video was helpful, please thumbs up and subscribe my Youtube channel:  Mikinoos DIY Thank you.