Sewing DIY Ribbon Teaser Cat Toy (free pattern)
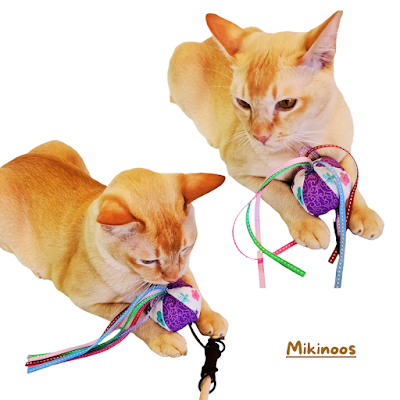
One of cat's fav toys never stay in good condition after playing for a while.
Fabric toy itself torned off
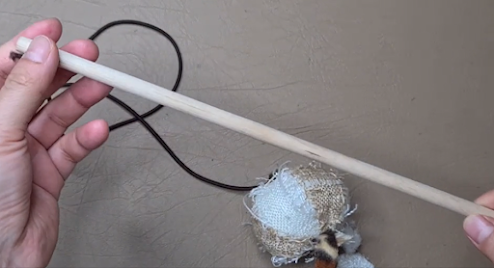
but Toy stick and elastric string are in good condition.
I decided to recover the fabric toy.


Step by step
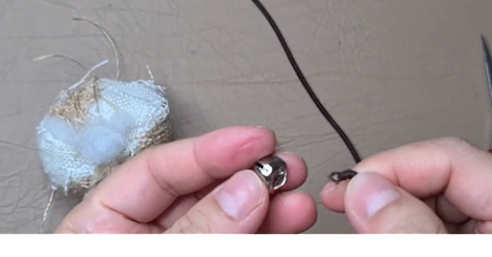
Step 1 - Cat teaser toy is shaggy from cat's chew. Saved to reuse wooden stick, elastic string, stuffing, and bell.
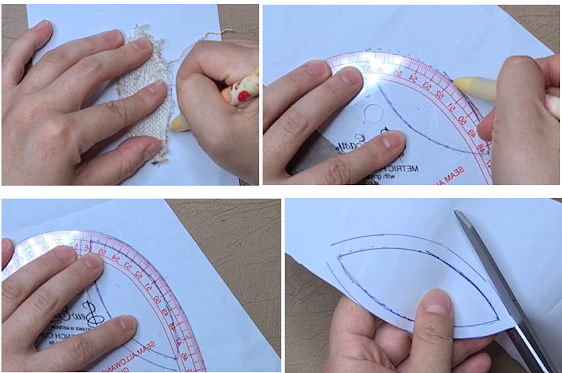
Step 2 - To copy the pattern of existing toy, choose and cut a piece in good shape. Refer the hyperlinked pattern in Youtube vido's description.

Step 3 - Draw a line or dot along the outline of the piece, and draw smoth line with using curvy ruler. Add 0.25 inches seam allowance, and cut the pattern.
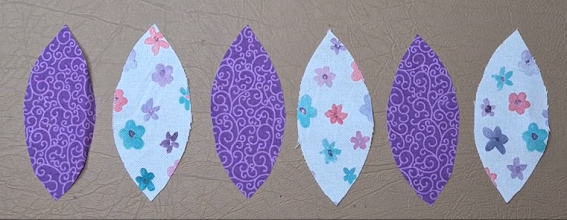
Step 4 - Cut out three pointy ovals from a fabric, and another three pointy ovals from a different fabric.
Step 5 - Select one each from the different fabric, and place the two pointy ovals together with the right sides facing in. Sew on the one side of curve, sewing with 0.25 inches seam allowance.

Step 6 - Turn right side out, and place next pointy oval on top with right side facing in, and sew. Repeat to the last. You should get it a ball shaped, with one curvy side un-sewn.

Step 7 - Use a needle and thread to sew the 6 or 7 of 8 inches long ribbons onto the right side of ball fabric bottom end, and silightly tuck in the tip of ribbon just sewn, and give some stitches to hold in place.

Step 8 - Blind stitches from the bottom to the middle of the ball to close open side, and stuff. Continue blind stitches to the top of the ball, and make sure leave a little hole on top.
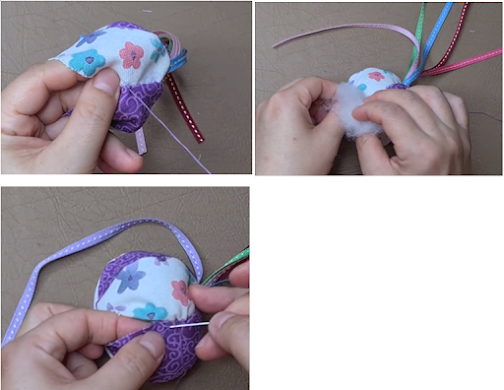
Step 9 - Put elastic string through and tie the bell, and leave some elastic end to make double knot.

Step 10 - Place double knot through the little hole of ball, and give some stiches to close off.

Done, and enjoy sewing~


Comments
Post a Comment