Sewing DIY Fleece Headband (measurements)
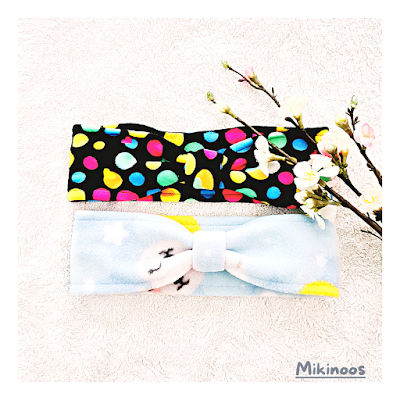
Beacuse I used a soft and flexible fleece fabric,
no elastics used and it was so easy to make.


For how to make, tutorial, please click the Video below, hope you enjoy.
If the Video was helpful, please thumbs up
and subscribe my Youtube channel: Mikinoos DIY
Thank you.
Step by Step
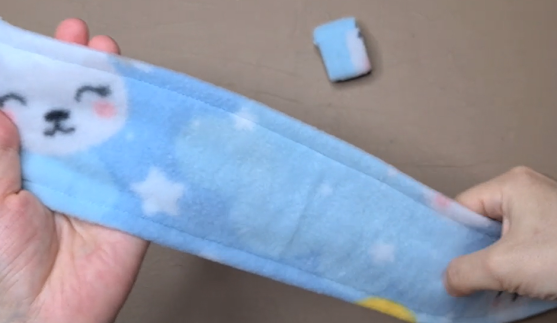
Flexible fleece fabric recommended for this project.
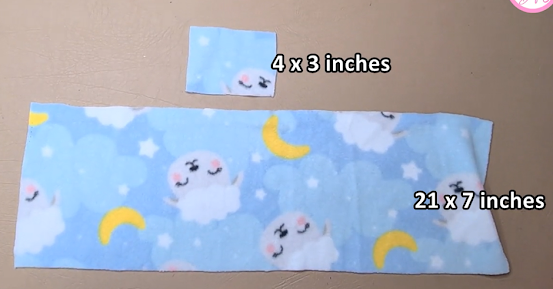
Cut out two rectangles that masure 4 x 3 inches and 21 x 7 inches.
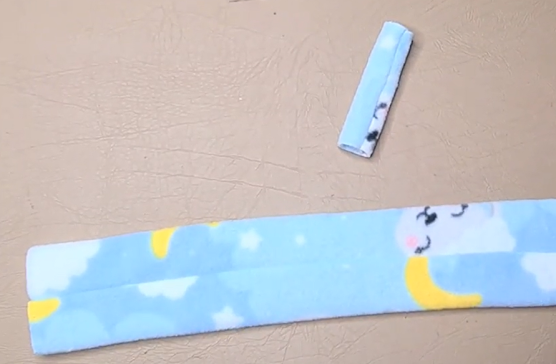
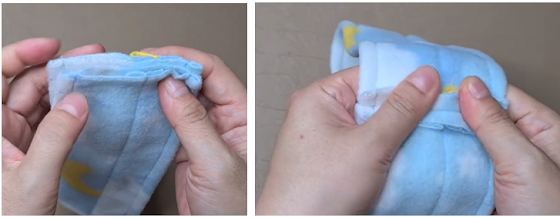
Center fold in length wise with right sides facing in. Pin and sew along the longer sides and sewing 0.25inch seam allowance. You should end up with a small tube and a big tube.

Turn it right side out, and press sewing lines in the middle of tube.
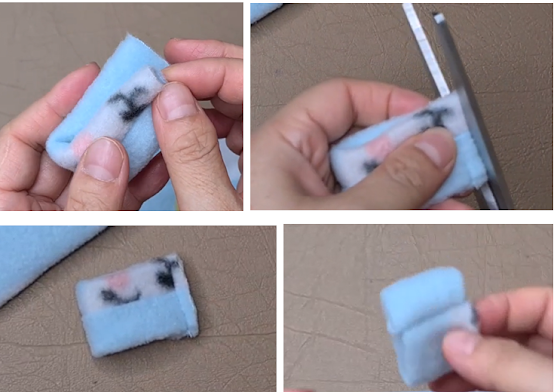
Fold the smaller tube in half, placing the open ends together. Pin and sew along that edge, sewing 0.25 inch from the edge (if seam is too wide, cut to short). Turn the little ring right side out so that the open ends are on the inside. These will be hidden once your are finished.
Sew 0.25 from the edge for both the longer sides.
Time to assemble: Pinch one of the end of bigger regangle piece and side the smaller tube over the bigger one and somewhere into the middle.
Fold the bigger rectangle in half so the raw edges meet. Sew together with a 0.25inch seam allowance. Press down the seam allowance.
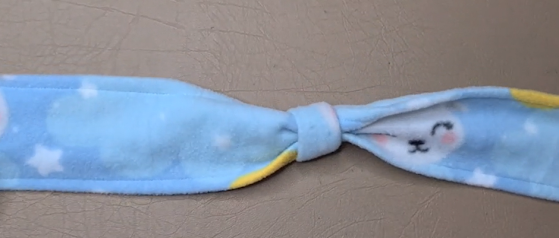
Pinch the the seam just sewn in above step, and slide the smaller tuge to sit on top of pinched seam, this will hide all the same lines. Play with the bigger rectangle to create nice bow, and give some stitches to hold in place.

Finished, Hope you enjoy~


Comments
Post a Comment